Overview
I wanted a way to start collecting environmental stats, without any vendor-lock in, preferably cheap, and in a form that I can store and use the data points long term. Z-Wave (Zigbee, Xbee, these are the same) looks great, especially since IKEA started to offer smart lights based on completely Open Source protocols.
Until Z-Wave, though, I have a spare Raspberry Pi 3, so let's see where I could get with these.
Physical setup
Initially I started with cheap sensors, like the DHT11, but those are way to inaccurate and their resolution is far from desirable: 1 °C without digits in case of the DHT11, so I bought better ones before moving on.
Unfortunately the accuracy of the BME280 temperature readings can be a bit messy as well, for which I'll only read every 10 minute and lower the read rate - the board the sensor is mounted on has a tendecy to overheat a little and these seem to be working countermeasures against that scenario1.
The setup needs:
- a Raspberry Pi 32 (or any Raspberry Pi, but given the 3 has built-in Wifi, which makes your life easy, I recommend the 3)
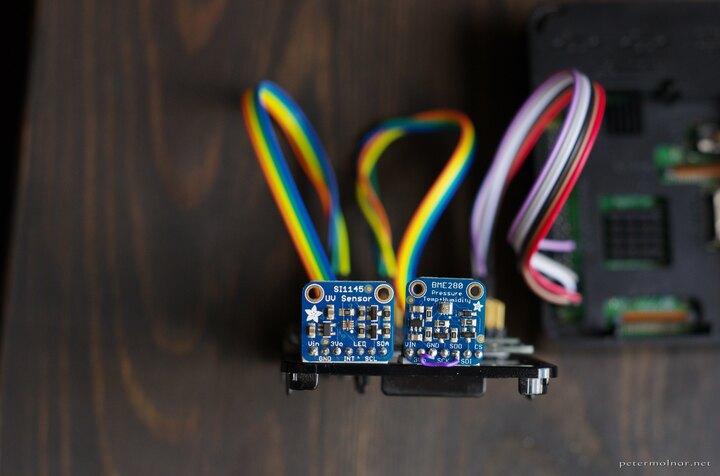
- an Adafruit BME2803 sensor: this will gather temperature, humidity, and pressure data
- an Adafruit SI11454 sensor: this will read UV, IR and visible light data
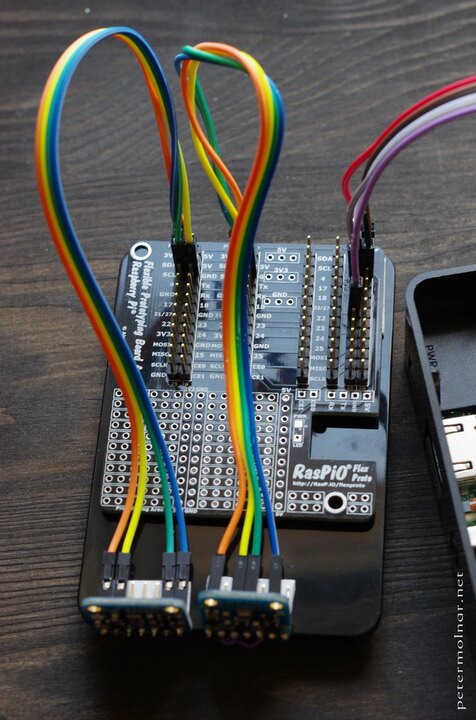
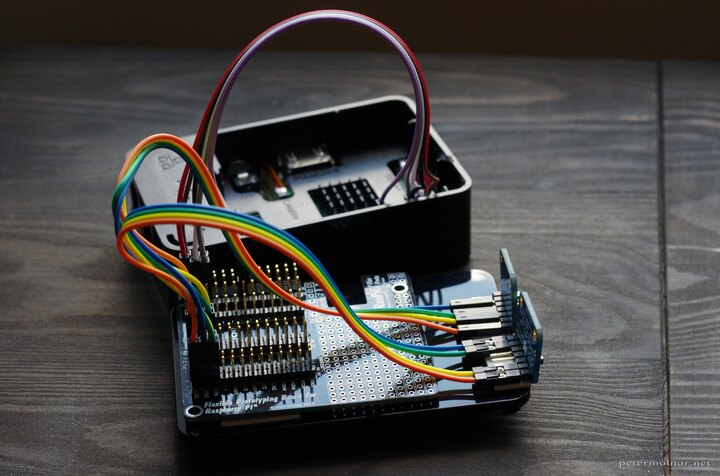
- something to multiplex the 3.3V, GND, SDA, and SCL (1, 6, 3, 4) pins on the Raspberry with for the 2 sensors OR simply connect them parallel. I've found RasPiO proto board in the Cambridge Makespace5, but this is for the original Pi and is out of production, so you'll need something like a TriBorg6 which triplicates the GPIO pins.


These are high resolution, accurate sensors. If you don't need this, or you're not a maximalist electrical engineer, feel free to go for anything cheaper, but keep in mind, that these are also I2C devices, so you can have a lot of sensors, and add new ones later. (Airflow, air quality, motion, etc.)
Wiring & pins
| Raspberry Pi pin | BME280 | SI1445 |
|---|---|---|
| 1 - 3.3V | Vin | Vin |
| 6 - GND | GND | GND |
| 3 - SDA | SDI | SDA |
| 5 - SCL | SCK | SCL |
Install & configure the software
Enable I2C on the Raspberry
Installing the Raspberry Pi is out of scope, there are many really good documents out there. One important bit: you need to enable the I2C module as:
- Run
sudo raspi-config. - Use the down arrow to select
9 Advanced Options - Arrow down to
A7 I2C. - Select
yeswhen it asks you to enable I2C, - Also select
yeswhen it asks about automatically loading the kernel module. - Use the right arrow to select the
<Finish>button. - Select
yeswhen it asks to reboot.
Collectd7
collectd is an Open Source stats collecting utility which can both collect stats locally and send or receive through the network. It's very lightweight - the collection part that is - and runs on more or less anything, can send to various backends, including Kafka, graphite, etc. In short, it's good for
Install collectd
sudo apt update
sudo apt install collectd-core collectd --no-install-recommends
Note: --no-install-recommends will save you, for
example, installing java. We won't need recommends.
Configure the collectd server
/etc/collectd/collectd.conf
FQDNLookup true
BaseDir "/var/lib/collectd"
PluginDir "/usr/lib/collectd"
AutoLoadPlugin false
CollectInternalStats false
Interval 600

LoadPlugin syslog
<Plugin syslog>
    LogLevel info
</Plugin>

LoadPlugin csv
<Plugin csv>
    DataDir "/where/you/want/your/csv/files"
    StoreRates false
</Plugin>

<LoadPlugin python>
</LoadPlugin>
<Plugin python>
  ModulePath "/home/pi/collectd"
  LogTraces true
  Interactive false
  Import "collectd_i2c"
  <Module collectd_i2c>
  </Module>
</Plugin>
Normally collectd use RRDTool to save data; this is a time series data format that compresses the old data after a while. Because I want to be able to use the data later on, in this case, I decided to go for CSV files which are easy to parse - or to feed to some machine learning.
Mosquitto8 MQTT server
MQTT is a lightweigh messasing protocol: it has a server, a hub, which collects all the incoming data; publishers pushing the data, and subcribers, reading topics. It's used widely in the "Internet of Things area" - though I seriously dislike the phrase -, and it's a good protocol to get started with. There are a few decent MQTT dashboard apps for Android, so it's easy to read the data as well with it.
Install Mosquitto
sudo apt install mosquitto mosquitto-clients
sudo systemctl enable mosquitto
sudo systemctl start mosquitto
Keep in mind that this will load your MQTT server without authentication and authorization on port 1883, so don't ever do this on an internet facing device.
To test it:
mosquitto_sub -h 127.0.0.1 -p 1883 -u 'your-mqtt-user-if-any' -P 'your-mqtt-password-if-any' -t '#' -vThe # is to subscribe to everything; replace it with
i2c to monitor our plugin only.
Install the necessary Python libraries
These are needed to build the sensor libraries and to interface with collectd.
sudo apt install i2c-tools python-dev python-pip git
sudo pip install collectd
sudo pip install paho-mqtt
Detect the sensors
The i2cdetect command will show you your sensors, if all
the wiring is happy:
pi@raspberry:~/ $ i2cdetect -y 1
pi@lydia:~ $ i2cdetect -y 1
     0  1  2  3  4  5  6  7  8  9  a  b  c  d  e  f
00:          -- -- -- -- -- -- -- -- -- -- -- -- --
10: -- -- -- -- -- -- -- -- -- -- -- -- -- -- -- --
20: -- -- -- -- -- -- -- -- -- -- -- -- -- -- -- --
30: -- -- -- -- -- -- -- -- -- -- -- -- -- -- -- --
40: -- -- -- -- -- -- -- -- -- -- -- -- -- -- -- --
50: -- -- -- -- -- -- -- -- -- -- -- -- -- -- -- --
60: 60 -- -- -- -- -- -- -- -- -- -- -- -- -- -- --
70: -- -- -- -- -- -- -- 77
Get the sensor libraries
Just run these in the pi user home directory.
Generic Adafruit libraries
git clone https://github.com/adafruit/Adafruit_Python_GPIO.git
cd Adafruit_Python_GPIO.git
sudo python setup.py install
Library for the BME280
I'm using a branch which is not yet merged into the main code, thanks to frank-f: this contains code with lets you set the mode for the BME280, which, in theory, helps with mitigatin the self-heating problems often mentioned with this board9.
git clone https://github.com/frank-f/Adafruit_Python_BME280
cd Adafruit_Python_BME280
git checkout reset-and-sleepmode
sudo python setup.py install
Library for the SI1145
git clone https://github.com/zzts/Python_SI1145
cd Python_SI1145
sudo python setup.py install
Create a simple ini file for your MQTT config
/etc/mqtt.ini
[mqtt]
host = 127.0.01
port = 1883
user = your-user-in-mqtt-server
password = your-password-in-mqtt-server
Create the collectd module
Save this to /home/pi/collectd/collectd_i2c.py:
#!/usr/bin/env python2

import collectd
import paho.mqtt.client as mqtt
import ConfigParser as configparser
import json
import SI1145.SI1145 as SI1145
from Adafruit_BME280 import *
import os

SENSOR_BME280 = BME280(
    t_mode=BME280_OSAMPLE_1,
    p_mode=BME280_OSAMPLE_1,
    h_mode=BME280_OSAMPLE_1,
    standby=BME280_STANDBY_500,
    filter=BME280_FILTER_off,
    address=0x77
)
SENSOR_BME280.set_mode(BME280_FORCED)

SENSOR_SI1145 = SI1145.SI1145(
    address=0x60
)

MQTT_CONF = configparser.ConfigParser()
MQTT_CONF.read('/etc/mqtt.ini')
MQTT_CLIENT = mqtt.Client()
MQTT_CLIENT.username_pw_set(
    MQTT_CONF.get('mqtt', 'user'),
    MQTT_CONF.get('mqtt', 'password')
)
MQTT_CLIENT.connect(
    MQTT_CONF.get('mqtt', 'host'),
    MQTT_CONF.get('mqtt', 'port'),
    120
)

def config_func(config):
    collectd.info('i2c plugin initialising')

def read_func():
    values = {}

    SENSOR_BME280.set_mode(BME280_FORCED)
    temperature = SENSOR_BME280.read_temperature()
    pressure = SENSOR_BME280.read_pressure()
    humidity = SENSOR_BME280.read_humidity()
    values.update({
        'humidity': {
            'value': humidity,
            'type': 'humidity',
            'unit': '%',
        },
        'pressure': {
            'value': pressure,
            'type': 'pressure',
            'unit': 'Pa',
        },
        'temperature': {
            'value': temperature,
            'type': 'temperature',
            'unit': 'C'
        },
    })
    SENSOR_BME280.set_mode(BME280_FORCED)

    light = SENSOR_SI1145.readVisible()
    ir = SENSOR_SI1145.readIR()
    uv = SENSOR_SI1145.readUV()

    values.update({
        'uv': {
            'value': uv,
            'type': 'gauge',
            'unit': '',
        },
        'ir': {
            'value': ir,
            'type': 'gauge',
            'unit': 'lux',
        },
        'light': {
            'value': light,
            'type': 'gauge',
            'unit': 'lux',
        },
    })

    for name, v in values.iteritems():
        v['value'] = round(v['value'], 2)

        val = collectd.Values(
            type=v['type'],
            plugin='i2c',
            type_instance=name
        )
        val.dispatch(values=[v['value']])
    MQTT_CLIENT.publish('i2c', json.dumps(values))

collectd.register_config(config_func)
collectd.register_read(read_func)
Start monitoring
The only remaining step you need to do is to start the collectd server:
sudo systemctl enable collectd
sudo systemctl restart collectd
If everything is happy - and they should be - your stats will be in CSV files under:
/where/you/want/your/csv/files/[your hostname]/i2c
directories, the one under DataDir in the collectd
configuration.
Enjoy your stats!
(Oh, by the way: this entry was written by Peter Molnar, and originally posted on petermolnar dot net.)